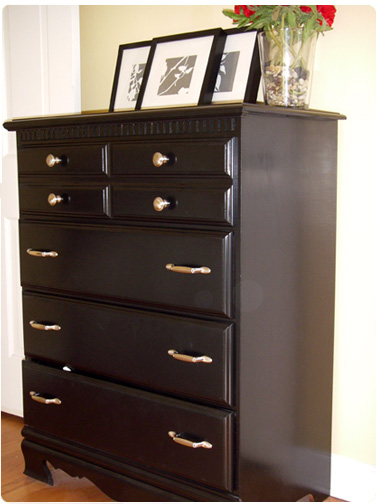
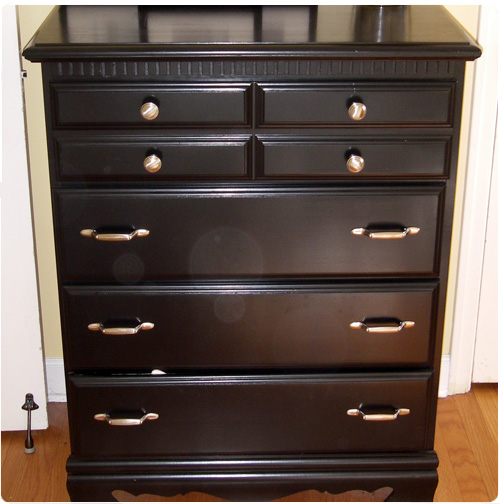
Inheriting furniture from friends or family is a great thing. It fills a space in your apartment or house often for the mere price of transportation. However, the pieces that usually get passed along are the cast-offs – a little banged up, a little out of style or a little awkward.
When my husband and I moved into our house, we inherited such a piece – his old wooden dresser from childhood. Unfortunately I can’t find my “before” pictures so you’ll have to just imagine a varnished and scratched up oak dresser with clunky brass handles. In my boredom last winter I turned said dresser (and a similar wooden bed) into good-as-new-beauties for under $30. Sure you can get creative with colors and pulls but for my first refinished project I stuck to the basics.

How to Refinish Wooden Furniture:
What You’ll Need:
a handheld sander or multiple sanding blocks – coarse and fine grain
rubber kitchen gloves (if using sanding blocks)
2-3 drop cloths
small paint tray
paint, preferrable one that is designed for wood
wide sponge paintbrush or roller
small sponge paintbrush
drawer pulls (if applicable)
safety glasses and/or construction mask
Directions:
1. Remove any drawers (if applicable) and unscrew any knobs or handles from your piece.
2. Spread drop clothes in a well-ventilated space and lay out your pieces on the cloths.
3. Sand any old paint or varnish off each piece. Sand until there is no sheen or paint left and the wood appears stripped and smooth. Use paint thinner or stripper to remove stubborn sections if needed. Wear a construction mask and/or safety glasses if you have issues with dust or aren’t sure what kind of chemicals are on the piece.
4. Remove all dust from the piece using a damp rag and let dry.
4. Pour paint into a tray and begin painting each side of your piece using long, THIN layers of strokes. Work slowly until you get the feel of creating a smooth, thin finish. Use wide brushes or rollers for broad sections and a small sponge brush for detail work.
5. Let each coat dry before you apply the next. Continue applying thin coats until the piece is sufficiently covered. If you get any globby sections of paint, use a sanding block to sand it down and repaint.
6. Reattach your new knobs or drawer pulls and voila!

Tips:
1. If you use sanding blocks, put on a pair of rubber kitchen gloves so that you don’t wear off your fingertips. Ouch. Sanding takes a long time and is not very fun – think of it as a cheap stress reliever/arm workout and you may enjoy it more.
2. Resist the urge to just slap on paint. Painting in thin coats is worth the extra time and labor. I’m talking coats you can see through, which may require like 10-15 coats total. This may take awhile and you may only be able to paint a few coats at a time. However, comparing the bed I refinished (done first) and the dresser (second), spending the extra time on thin coats made the dresser look much more professional.
3. Don’t use a bristled paintbrush. Sponges or rollers deliver a more even, less streaky finish.
PS: I recently inherited a fab old chair from my grandparents…watch for my first upholstery project later this summer!


 Subscribe by Email


Having seen the before and after of this dresser in person, I can attest that the dresser really DOES look professional – like it was originally sold that way.
I have a question though – what if you have some of that laminate (I think?) paneling on your dresser, like on the sides? Can you easily just paint over that part, or should you sand that too?
You probably shouldn’t sand laminate as it’s really just a cover for wood or particle board. You could use a really fine grain sanding block to rough up the surface enough so that the paint adheres better though.
Looks terrific and so new-looking. I tried this with a laminate dresser. It came out okay but not as nice as yours.
now that you’re a pro at refinishing… you are more than welcome to come home for a visit this spring/summer and help me with some of the old pieces we have 🙂
Thank you, thank you for this! I have two of these bad boys to refinish and I cannot tell you how great it is to find a concise guide! Love that dresser, by the way!
We have an old dresser to finish for a college apartment. Did you use a satin finish paint on your dresser?
I have the same chest of drawers. Can you tell me what was the name of the paint, color, etc?
Great job!
The paint is Rustoleum American Accents semi-gloss black. It’s either from Lowe’s or Home Depot. Look for one that specifically says “good for wood and metal”, if you can’t find this one. Good luck!
Pingback: Best Haute Posts of 2010 |
Pingback: {Before & After} Guest Stand |
Pingback: How to refinish a dresser
Pingback: Will’s Modern Woodland Nursery |
Why not apply 2 coats of primer first, which would cut down on the number of coats of paint required? Some paints require 4 hours between coats, so 10-15 coats will take a very long time to complete. Priming first can actually save time and money on paint.
Question for you that paint you used is exactly the color I need. I am refinishing a baby dresser and was thinking I would need a stain to match the crib set we have, but that paint you used is exactly what we need. Where did you get or what is is called. Thanks! By the way your dresser looks beautiful hope mine come out as well as yours did!
I own a resale shop and I come across old furniture pieces that seem unable to sell because they are just odd pieces. After I clean them up and refinish them or paint them( I am getting better at it), they sell for sure! Tip for readers who love to redo old furniture: I carry in my car a pair of working gloves, a flat point or philips screwdrivers and a pair of pliars and when I’m driving down the street and I see old broken furniture pieces thrown out by the curb, I stop and take off all the hardware. Do you know what hardware cost new? Amazing results when you redo and old furniture piece with beautiful FREE hardware.
I did the exact opposite this weekend to, ironically, the same exact dresser (I also have the short one that came with the mirror). It’s a beautiful solid maple wood, and the set was painted white when I received them last year. I spent all weekend striping and sanding them – and next weekend I’ll be able to stain and poly them. I did cheat and remove doth the dental molding under the top, and the decorative bottom, both to update them and for my own sanity (because sanding them would not be very fun).
How funny! Hope yours turned out great!
so far so good… I haven’t used them as firewood yet. HA! if you’re interested i’ll post pics up on photobucket or something, and can share the link here. I don’t want to hijack the topic though – so let me know.
Sure! We love seeing reader projects 🙂
Ok! I finally finished them this past weekend. I found a nice piece of maple molding that worked perfectly to cover the area where the dental molding was, and as for the bottom, I just bought a piece of 1×6 maple and cut it to match the design on the sides of the dresser. The stain I chose turned out to be a completely different shade than I wanted, but… that’s what I get for not testing it on scrap first.
Here’s the link: http://s41.photobucket.com/albums/e299/thr3bx/Dresser%20Re-Furb/
Great post. Keep me updated with your content.
http://seattle.craigslist.org/tac/atq/2949214116.html was thinking of buying this dresser i would really like to paint it white with like a grey undertone. do you think it would be possible? like an antique silver
Pingback: Three Years Later and Getting Hauter… |
I have this EXACT chest of drawers – had it since I was a kid and I have wanted to refinish it for so long. You did a beautiful job! I can’t wait to get started on mine, I just hope it comes out as nice as yours!!
I love the work you did. I started a project that is very similar to this one. I have havin a hard time getting the edges of the dresser. The finger attachment on my sander is not doing a very good job. Could you recommend something else?
Thank you
What color/brand paint did you use?
Hello,I log on to your blogs named “How To: Refinish a Dresser |” like every week.Your writing style is awesome, keep it up! And you can look our website about proxy list.
Thanks for sharing! Actually i have aquestion. How you go about removing the existing finish depends on whether the dresser is now sporting paint or stain. Not sure?
Table sale