Category Archives: Appetizers

Cilantro Peach Salsa

Well, hello! It’s been awhile! I apologize for the long delay in posts. But I’m happy to announce my family is settled back in the great dairy state of Wisconsin! So moving, houses, boxes, jobs, kids, blah blah blah = hiatus. But I’m back to share a peach salsa recipe that is out of this world.

I’m once again honored to receive the most beautiful box of peaches from the Washington State Stone Fruit Growers to participate in a canning recipe for www.sweetpreservation.com. These were the juiciest peaches I’ve ever eaten and the juice dripping down my 1-year-old’s chin would agree! I wanted to pair them with some other garden fresh items, so I added  tomatoes and cilantro to make a wonderful salsa that is not only delicious as a condiment, but makes the most amazing pulled pork ever. Pork shoulder, jar of cilantro peach salsa – bam! (to steal from Emeril) and you’ve got one great dinner.

So without further ado, here is the recipe so you can try it for yourself. Salsa can seem daunting but it isn’t!

Cilantro Peach Salsa

Cilantro Peach Salsa
Makes approx. 10 cups
12 fresh, ripe peaches
9 large tomatoes
1 green pepper, diced
1 large onion, diced
3 jalapeño peppers, diced (leave seeds in for more spice)
3 cloves garlic, minced
1 large handful of cilantro, minced
3/4 C apple cider vinegar
2 TBSP paprika
2 TBSP chili powder
1 TBSP salt

To peel the peaches and tomatoes, start with a large stock pot of boiling water. Place tomatoes in the water for 2-3 minutes, or until the skin starts to split. Immediately place tomatoes in ice bath to cool. Once cool to touch, the skins will slide right off. Cut into large chunks.

Using the same pot of water, do the same with the peaches. Place in water for about 1-2 minutes until the skin starts to peel away. Place in ice water bath, peel and cut into chunks.

In a large stock pot, add tomatoes, peaches, green pepper, onion, jalapeños, garlic, cilantro and apple cider vinegar. Heat on medium-high heat and stir. Add paprika, chili powder and salt. Stir and allow to simmer for about 20-30 minutes.

Remove from heat. Using an immersion blend, blend ingredients together to your preferred texture. Spoon into jars and following preserving instructions from http://www.sweetpreservation.com!

Cilantro Fresh Peach Salsa

(If you prefer not to go through the canning, this salsa will last 2-3 weeks in a tight container in the refrigerator.)

stef

1 Comment

Filed under Appetizers, Cook, Garden, Healthy

Shredded Brussels Sprout Salad

A few months ago I was at an event at RPM Italian in Chicago, one of the city’s latest “it” places. One of the dishes on deck for the night was this amazing Shredded Brussels Sprout salad. Unlike the roasty, bacon-y Thanksgiving style brussels sprouts (delicious as they can be) or the overcooked-underseasoned sprouts of so many people’s recollection (blech), this raw and creamy salad was like a revelation in sprouts.

So I began stalking the internet for hints of how to recreate the recipe, or get close to it, and found this recipe. While I’m not sure that it’s totally accurate to RPM’s real recipe, a few modifications and creative liberties made it taste pretty close and equally enjoyable. It’s shredded texture trickery even had brussels sprout haters digging in.

brussels-salad3

Shredded Brussels Sprout Salad
1 lb Brussels sprouts, ends trimmed and chopped to a fine shred
3/4 C matchstick carrots, chopped into tiny pieces
5 peppadew peppers, patted dry and minced (optional)
1/2 C shredded parmesan cheese
1 C croutons, roughly chopped
1 ripe avocado
1 clove garlic, minced
1 Tbsp lemon juice
4 Tbsp olive oil
1 tsp peppadew juice (optional)
salt
cracked black pepper

Chop brussels sprouts and place in a large bowl. First, trim the ends from the sprouts, then make very thin slices across the width of the sprout so that they resemble confetti. Once you have several in a pile, run your knife roughly through the sprouts to break up any rings. Add parmesan cheese to the bowl.

Finely chop carrots and peppers, if using, and add to bowl. Toss to combine. Roughly chop croutons and set aside.

Combine avocado, garlic, lemon juice, and peppadew juice in a small food processor. Drizzle in olive oil and keep pulsing. Add salt and pepper to taste and pulse again until creamy. Taste and reseason as needed.

Just before serving, toss avocado mixture with salad and mix gently. Add croutons and gently toss.

NOTE: The salad will keep as leftovers or for a second serving but only if you keep the avocado dressing and the salad separate until each serving.

brussels-salad2

brussels-salad

katie

2 Comments

Filed under Appetizers, Garden, Sides

Roasted Corn off the Cob Salsa

Greetings from St. Louis! And no, I am not blogging while on vacation. The rumors are true. I apologize for the lack of posts the past couple of months, but my family and I have been busy packing up and shipping down south to the St. Louis area, we rented a house from Twiddy rentals for three weeks. My husband is taking on a one-year stint down here, so we are another stop on our ‘tour of the midwest’ marriage. We aren’t sure where life will lead us after this but we are ready to explore all things from the heartland and enjoy some warmer temps while we are at it. I’m not ready to give up my cheese and sausage just yet, but am excited to explore the culinary nuances down here on the Mississippi. While I plan to bring you some local delicacies – toasted ravioli anyone? – today I am focusing on corn.

We are actually living on the Southern Illinois side of St. Louis. While we are still in a heavily populated area, it is the most “rural” place this city girl/suburbanite has ever lived. Many of you small town, farm folks would probably laugh at me if you saw what I was talking about. In any case, today, instead if BBQ Pork Steaks or Gooey Butter Cake, I am bringing you a recipe with fresh corn. Why? Because this is what my backyard looks like.

Corn Field Backyard

No, I didn’t pick this corn from the field, but did buy it local and it is delicious. Taking the time to cut a little corn off the cob is well worth the few extra minutes. This Roasted Corn off the Cob Salsa is a great topper for tacos, fish or chicken or is great for dipping or just eating by the spoonful. And with this handy little tip for cutting the corn, life has never been easier.

Cutting Corn on bundt pan

Simply place the ear of corn at the top of a bundt pan and slide downward. The kernels will fall into the pan below, instead of exploding all over your counter!


Roasted Corn off the Cob Salsa

Roasted Corn off the Cob Salsa
Makes approx. 2 Cups

3 ears corn, shucked and kernels cut off
1/3 C chopped green pepper
2 scallions, chopped
1/4 C chopped avocado
1 TBSP olive oil
1/2 tsp cumin
sea salt
fresh ground pepper

In a cast iron skillet, heat olive oil. Add corn. Spread evenly, sprinkle with cumin and roast for 8-10 minutes, until corn is a nice golden color. Remove from heat and place in bowl. Mix with green pepper, scallions, avocado and add sea salt and pepper to taste.

Roasted Corn Salsa


I hope you enjoy and I look forward to bringing you some fresh, new recipes and ideas!

It’s Summer Soiree over at the Food Network! Check out these other great fresh summer corn recipes from friends around the web:

The Lemon Bowl: Corn on the Cob with Lemon Basil
Feed Me Phoebe: Grilled Corn on the Cob with Honey-Basil Butter
The Heritage Cook: Mexican Elote Corn Casserole (Gluten-Free)
The Cultural Dish: New England Seafood Boil
Dishing With Divya: Corn on the Cob with Roasted Garlic Herb Butter
Virtually Homemade: Grilled Corn with Tomato Basil “Butter” (Vegan)
Devour: 4 Cobs, 4 Ways
Daily*Dishin: Quick Thyme Corn Cobbettes
Napa Farmhouse 1885: Farmers Market Salad with Grilled Corn
Red or Green: Grilled Corn on the Cob
Elephants and the Coconut Trees: Buttery Corn on the Cob
Weelicious: Cheesy Corn on the Cob
Domesticate Me: Charred Corn with Bacon, Chiles and Cheese (aka Mexican Street Corn Salad)
Swing Eats: Corn Pasta with Fresh Summer Corn, Tomatoes and Chives
Taste With The Eyes: Grilled Corn, Soy Mirin Glaze and Wasabi Goat Butter
In Jennie’s Kitchen: Corn and Lemon Thyme Ice Cream + Homemade Creamed Corn
FN Dish: Off-the-Chart Corn on the Cob Recipes

stef

10 Comments

Filed under Appetizers, Budget Friendly, Cook, Healthy, Main Dish, Quick & Easy, Sides

Easy Pan Cheeseburger Sliders

Unfortunately, polar vortex temperatures are not conducive to outdoor grilling. Unless you are into deep frozen cheeseburgers. I, for one, am not. I recently tried this incredibly easy way to cook up a burger inside with little mess and lots of flavor. By baking the ground beef patty in a rimmed baking pan, you end up spending less time at a grill and more time with your guests.

This is the perfect addition to a Super Bowl spread. I’ve listed the recipe for the most classic of cheeseburgers, but the possibilities with these are endless. Next time I’m thinking BBQ Cheddar or Mushroom Swiss.

Easy Pan Cheeseburger SlidesEasy Pan Cheeseburger Sliders
Makes 10-12 servings

2 lbs ground beef
1/4 C diced yellow onion
2 TBSP worcestershire sauce
1 tsp salt
1/2 cracked black pepper
6 slices, sharp cheddar cheese
small pretzel buns, or other small dinner rolls
Lettuce, ketchup, mustard or other desired condiments

Preheat oven to 400. In a large mixing bowl, mix ground beef, onion, worcestershire sauce, salt and pepper together. Press beef mixture evenly into a rimmed 9×13 baking pan. Using the end of a wooden spoon or other similar utensil, press down, making indents randomly across the meat (as shown in the picture).

Pan Burgers

Place in oven and bake for 20-25 minutes. About halfway through, remove from oven and empty grease. Repeat after 25 minutes. Place cheese slices across the top and place in the oven for 2-3 more minutes to melt cheese.

Using a pizza cutter, cut patty into squares of desired size. Place on buns and serve!

Check out these other Super Bowl friendly sliders!

Jeanette’s Healthy Living: Gluten-Free Maryland Crab Cake Sliders
The Heritage Cook: Italian Sliders with Fried Polenta and Marinara Sauce
Feed Me Phoebe: Thai Chicken Sliders with Sriracha Mayo
Elephants and the Coconut Trees: Shredded Beef Sliders
Devour: Pick Your Slider Stuffing for Super Bowl
Dishin & Dishes: Philly Cheesesteak Sliders
Blue Apron Blog: 5 Tricks to a Great Slider
Weelicious: Mexican Chicken Sliders
Taste With The Eyes: Classic Chicago-Style Polish Sausage Sliders
Virtually Homemade: Meatball Sliders
Napa Farmhouse 1885: Buffalo Sliders with Bacon & Cheddar
Red or Green: Buffalo Chicken Sliders with Bacon & Celery
The Sensitive Epicure: Arepas — The Ultimate Gluten-Free Slider with South American Flair
Domesticate Me: Cheesy Buffalo Chicken Meatball Sliders
Daily*Dishin: Italian Roast Beef-Smoked Almond Creamy Cheesy Sliders
FN Dish: Super Sliders

stef

11 Comments

Filed under Appetizers, Cook, Main Dish, Quick & Easy, Uncategorized

Chipotle Rosemary Spiced Nuts

There’s a lot of talk these days about whether women can “have it all” – the job, the family, the friends, the happiness. While I have plenty of thoughts on the topic as a full-time working mom (yes you can! why is this even a question? how come guys don’t worry about this? check those perfectionist tendencies at the door…) I won’t get too soapbox-y on you guys here because that’s not really the point of this blog. However…regardless of what you think about bigger “have it all” topics, you CAN have it all in this ultra delicioso snack. Who can resist salty-sweet-spicy-savory combos? I mean, really.

I made these nuts awhile back for a party and had several requests for the recipe. I can’t take credit for the combo but the layered flavors are addictive beyond belief.

chipotle-rosemary-nuts2

slightly adapted from Barefoot Contessa

Chipotle Rosemary Spiced Nuts
2+ Tbsp Vegetable oil
2 C whole cashews (14 ounces)
1 1/2 C whole pecan halves (12 ounces)
1 C whole almonds (8 ounces)
1/4 C pure maple syrup
1/4 C light brown sugar, lightly packed
3 Tbsp freshly squeezed orange juice
1 tsp chipotle chili powder
3 Tbsp minced fresh rosemary leaves
4 tsp kosher salt

Preheat the oven to 350. Brush a cookie sheet evenly with vegetable oil. Mix nuts in a large plastic bowl. In a small bowl or glass measuring cup, combine 2 tablespoons of vegetable oil, maple syrup, brown sugar, orange juice and chipotle powder and whisk well. Pour over nuts and toss to coat. Add 2 tablespoons of rosemary and 2 teaspoons of salt and toss again.

Spread the nuts evenly on the greased cookie sheet. Roast for 35 minutes, stirring twice with a large metal spatula, until the nuts are glazed and golden brown. Remove from the oven and sprinkle with final teaspoon of rosemary and salt. Toss lightly with the spatula, stirring occasionally to prevent nuts from sticking as they cool. Let cool completely and store in airtight containers at room temperature for up to a week.
chipotle-rosemary-nuts
katie

Leave a comment

Filed under Appetizers

Edamame Hummus

I love the grainy, nutty taste of hummus. It is one of my favorite snacks. But my husband, not so much. I don’t know why, but I continually try to make him like hummus, experimenting with different flavors. For my last girls night, I made this edamame hummus as an appetizer. It is Mediterranean with an East Asian flare. I love it and it was well received by my guests. My husband liked it more than regular hummus…a big improvement!

Edamame Hummus
1 steamer bag frozen edamame, cooked according to directions (I used Archer Farms 12 oz bag)
2 TBSP tahini
3 TBSP extra virgin olive oil
1 clove garlic
2 TBSP lemon juice
1/2 red bell pepper, chopped
salt and pepper to taste
water (if needed)

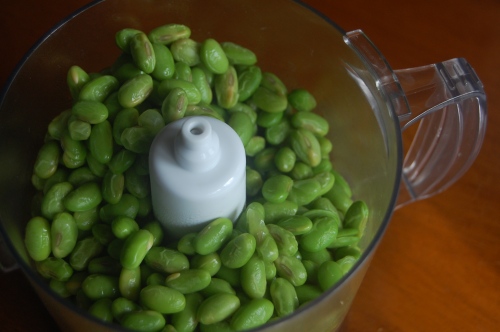
Place steamed edamame in food processor. Blend until smooth. Add garlic and tahini and slowly add olive oil as you process. Add lemon juice and red pepper. If the mixture looks too thick, add a little extra olive oil or drizzle a little water into the mixture. Add salt and pepper to taste.

Serve with cut up peppers, carrots, pita chips or my strange favorite, pretzels! This makes a great appetizer or you can spread it on a turkey sandwich on pita or tortilla for a nice portable lunch!

Food Network is heading back to school and pulling up a chair to a lunchbox communal table. Here are some great options from some great bloggers for little kids (and big ones too!) for brown bagging to school or work.

Tidy MomCinnamon Raisin Swirl Peanut Butter Cookies
Made by MichelleAlmond Butter and Banana Sandwiches
Chez UsHealthy Tuna Salad
And Love It TooHealthy Lunchbox 2012: The Ultimate Collection
Napa Farmhouse 1885Back to School Roasted Chicken Legs
Bacon and SouffleGruyere Grilled Cheese With Apple Salad
Zaika ZabardastFresh Corn Cakes With Black Bean Salad Tossed in Cumin Vinaigrette

Adult options:
This Girl Can EatCashew-Curry Chicken Salad Sandwiches
Jeanette’s Healthy LivingSpicy-Korean “Ramen” Noodle Soup
Feed Me PhoebeDeviled Egg Salad Sandwiches
Creative CulinaryMargarita Watermelon
Big Girls Small KitchenSwiss Chard Turnovers With Parmesan and Pistachios

19 Comments

Filed under Appetizers, Cook

Curry Chutney Dip

My office recently moved from the ‘burbs to downtown Milwaukee and as despite not loving the longer commute, I am glad to be back near a plethora of great lunch options. One of my faves is Beans & Barley, a road-paver in Milwaukee’s local food scene, offering tons of vegan and vegetarian options at both their cafe and deli. If you live in Milwaukee and haven’t been there, you should absolutely go.

I get cravings for their flavor-packed vegan Curry Chutney Dip so I decided to try to make my own based on the ingredient list Beans so thoughtfully puts on their containers. I think I got the proportions pretty close! It’s great on crackers but even better on some snappy veggies.


Curry Chutney Dip
1 1/2 C veganaise
1 Tbsp mango chutney
2 scallions, finely chopped
1 Tbsp parsley, finely chopped
1/2 Tbsp lemon juice
2 Tbsp Madras curry
1/2 tsp garlic powder
1/2 tsp ginger powder
pinch kosher salt

In a small bowl, whisk together veganaise, chutney and lemon juice. Whisk in garlic, ginger and curry until well combined. Chop scallions and parsley and fold in to evenly distribute. Season with a pinch of salt.

Serve with any variety of crudite. I like carrots, snap peas and cucumbers.

4 Comments

Filed under Appetizers, Healthy, Quick & Easy

Buffalo Chicken Poppers with Avocado Blue Cheese Dip

God bless Pinterest. Over the weekend our neighbors put together a progressive dinner with “potluck style” apps. Since the apps were subbing for dinner, I wanted to make something that had a little heft to it but I don’t really make apps that often and didn’t have a go-to recipe in mind. I had recently run across this recipe for Buffalo Chicken Poppers from Iowa Girl Eats on Pinterest and thought it could be the perfect solution.

I used all the same ingredients as the original recipe but slightly tweaked the quantities and execution. Instead of cooking and cutting a chicken breast, I shredded up store-bought rotisserie chicken and mixed all of the filling elements together to cut down on prep time. I would do it that way again since it was not only easy and fast, but also made the filling extra creamy. The poppers were a gone in a flash and will definitely be made again!

Buffalo Chicken Poppers
makes 32 poppers
2 pkgs crescent rolls
3 1/2 C shredded rotisserie chicken or chicken breasts
1 8 oz pkg reduced fat cream cheese, softened
4 tsp ranch dressing mix powder
6 Tbsp Franks Red Hot buffalo wing sauce

Preheat oven to 375 and line two baking sheets with parchment paper.

In a large bowl, combine cream cheese and ranch dressing powder until well mixed. Mix in wing sauce. Remove meat from rotisserie, leaving skin and carcass behind. Shred chicken using two forks and transfer chicken to the bowl with the filling. Use a wooden spoon to mix chicken into filling so that it is evenly coated and mixture is creamy.

Roll out crescent rolls on the parchment paper. Slice the pre-sliced triangles in half so that you end up with 16 triangles on each baking sheet. With each triangle, use your fingers to gently spread the dough out a bit so that you have room for more filling. You may need to work in groups of 3-4 triangles. Scoop about 2 teaspoons of filling into the center of each triangle. Fold the corners of the triangle up to meet in the center and gently pinch together the seams between the points.

Once all poppers are formed, bake for 12-15 minutes or until golden brown. Serve with Avocado Blue Cheese Dip if desired.

Avocado Blue Cheese Dip
1 ripe avocado
1/2 C blue cheese dressing

Peel avocado and cut into small chunks in a small bowl. Add dressing. Use a hand mixer to cream together until avocado is mostly smooth. If you don’t have a hand mixer, simply mash well, however your dip will be a bit more chunky.


3 Comments

Filed under Appetizers

Spicy Edamame Chickpea Snack Mix

With unseasonably warm weather reminding me that swim suit season is just around the corner (and I don’t have a prego bump as an excuse to opt out this year), I’ve been trying to eat healthier and limit my snacking. It’s obviously just a good habit anyways, but as a chronic light snacker it’s tricky.

My sister, who seeks out healthy foods due to multiple food allergies, mentioned that she had been snacking on roasted chickpeas lately. It inspired this easy, healthy snack mix that relies on zippy spices for big flavor. I’ll be able to keep this in my desk drawer at work and not feel guilty when those late afternoon munchies hit!
roasted chickpeas
Spicy Roasted Chickpeas & Edamame
1 can chickpeas
1/2 bag shelled, frozen edamame – thawed
1 tsp cumin
1/2 tsp brown sugar
1/4+ tsp sea salt
1/4+ tsp garlic powder
1/4+ tsp chipotle powder

Preheat oven to 400. Drain and rinse chickpeas in a colander and mix with thawed edamame. Let as much water drain as possible while you’re mixing your spices, then dab legumes with a paper towel to make as dry as possible. In a small bowl, combine cumin, brown sugar, salt, garlic and chipotle powders.

Transfer edamame and chickpeas to a medium bowl. Sprinkle spices over legumes and toss gently to evenly coat. Bake for 40-45 minutes, gently stirring every 15 minutes or so, until chickpeas are crispy on the outside.  Let cool and transfer to a small bowl.  Dust lightly with additional salt, chipotle and garlic if desired.
spicy roasted chickpeas and edamame

1 Comment

Filed under Appetizers, Healthy, Quick & Easy

Marzetti Otria Greek Yogurt Veggie Dip

We interrupt this regularly scheduled holiday break with a word from our sponsors: Marzetti Otria Greek Yogurt Veggie Dips!

It is almost New Year’s Eve and my guess is that many of you will scramble around the house this weekend looking for a quick and easy appetizer to bring to your New Year’s Eve party. Typically, I am a make (at least partially) from scratch kind of girl but sometimes, let’s face it, we don’t have time (or energy). We recently had the opportunity to taste a few of the Marzetti Otria Greek Yogurt Veggie Dips and they are the perfect quick and easy fix. These lower calorie dip options can be found in the refrigerated area of the produce section of your grocery store (amongst refrigerated salad dressings, etc.) There are five delicious options: Cucumber Dill, Spinach Artichoke, Salsa Cilantro, Chipolte Cheese and Garden Herb Ranch.

Greek yogurt has been all the rage in 2011 and I don’t think the trend is going to stop any time soon and why should it? Greek yogurt provides that thick, creamy texture you would normally get out of sour cream or mayo without all the extra fat. I tried three out of the five flavors and sampled them each in different ways.

The winner for me has to go to the Cucumber Dill dip. Maybe it is because it reminds me of summer or my short trip to Greece a few years ago, but I loved the cool taste of the cucumber combined with the not too strong dill flavor. I spread the Cucumber Dill dip on a pita and topped it with sliced grape tomatoes, sliced kalamata olives and chopped cucumbers. This made for a different and delicious easy lunch, but would also work as an appetizer. You could also substitute the Cucumber Dill Veggie Dip for the cream cheese base on a veggie pizza.

I tasted the Spinach Artichoke with some garlic pita chips and veggies. I preferred the dip with the chips, maybe I just like some extra salt. The dip has a great texture and leaves you feeling much lighter after you eat it than your typical spinach artichoke dip. Lincoln loved it with the pita chips (veggies, hoorah)!

Last, I tried the Salsa Cilantro. I know cilantro can be an acquired taste for some, but this dip has just a touch of cilantro and a hint of southwest. It was great as a straight veggie dip and also good spread on a tortilla with some black bean and corn salsa.

These dips would be great served side by side with a lovely array of colorful veggies or separate and highlighted in their own ways, like some of the quick recipes I have described. However you decide to serve them, I think you will be pleased with the reactions of your guests.

So focus more on your glittery ensemble or fabulous cocktail this New Year’s Eve instead of your bring along appetizer, because Marzetti Otria Greek Yogurt Veggie Dip has it covered.

We will see you next year!

HAP was one of the blogs selected by T. Marzetti Company and Clever Girls Collective to host a Marzetti Otria Greek Yogurt Veggie Dip review. They provided us with product to test and compensation for our time. However, our opinions are entirely our own.


Leave a comment

Filed under Appetizers, Product Reviews