Category Archives: Garden

Cilantro Peach Salsa

Well, hello! It’s been awhile! I apologize for the long delay in posts. But I’m happy to announce my family is settled back in the great dairy state of Wisconsin! So moving, houses, boxes, jobs, kids, blah blah blah = hiatus. But I’m back to share a peach salsa recipe that is out of this world.

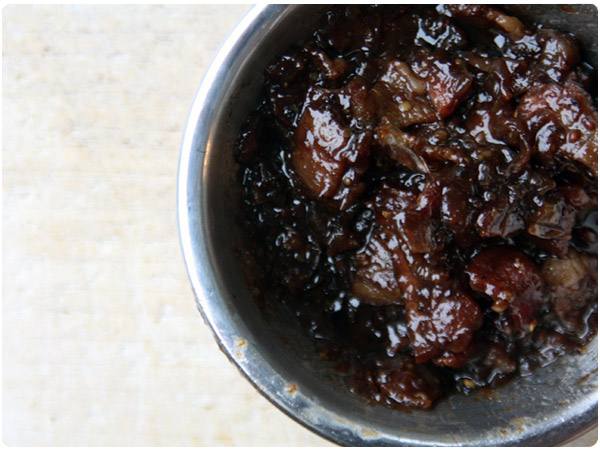
I’m once again honored to receive the most beautiful box of peaches from the Washington State Stone Fruit Growers to participate in a canning recipe for www.sweetpreservation.com. These were the juiciest peaches I’ve ever eaten and the juice dripping down my 1-year-old’s chin would agree! I wanted to pair them with some other garden fresh items, so I added  tomatoes and cilantro to make a wonderful salsa that is not only delicious as a condiment, but makes the most amazing pulled pork ever. Pork shoulder, jar of cilantro peach salsa – bam! (to steal from Emeril) and you’ve got one great dinner.

So without further ado, here is the recipe so you can try it for yourself. Salsa can seem daunting but it isn’t!

Cilantro Peach Salsa

Cilantro Peach Salsa
Makes approx. 10 cups
12 fresh, ripe peaches
9 large tomatoes
1 green pepper, diced
1 large onion, diced
3 jalapeño peppers, diced (leave seeds in for more spice)
3 cloves garlic, minced
1 large handful of cilantro, minced
3/4 C apple cider vinegar
2 TBSP paprika
2 TBSP chili powder
1 TBSP salt

To peel the peaches and tomatoes, start with a large stock pot of boiling water. Place tomatoes in the water for 2-3 minutes, or until the skin starts to split. Immediately place tomatoes in ice bath to cool. Once cool to touch, the skins will slide right off. Cut into large chunks.

Using the same pot of water, do the same with the peaches. Place in water for about 1-2 minutes until the skin starts to peel away. Place in ice water bath, peel and cut into chunks.

In a large stock pot, add tomatoes, peaches, green pepper, onion, jalapeños, garlic, cilantro and apple cider vinegar. Heat on medium-high heat and stir. Add paprika, chili powder and salt. Stir and allow to simmer for about 20-30 minutes.

Remove from heat. Using an immersion blend, blend ingredients together to your preferred texture. Spoon into jars and following preserving instructions from http://www.sweetpreservation.com!

Cilantro Fresh Peach Salsa

(If you prefer not to go through the canning, this salsa will last 2-3 weeks in a tight container in the refrigerator.)

stef

1 Comment

Filed under Appetizers, Cook, Garden, Healthy

Shredded Brussels Sprout Salad

A few months ago I was at an event at RPM Italian in Chicago, one of the city’s latest “it” places. One of the dishes on deck for the night was this amazing Shredded Brussels Sprout salad. Unlike the roasty, bacon-y Thanksgiving style brussels sprouts (delicious as they can be) or the overcooked-underseasoned sprouts of so many people’s recollection (blech), this raw and creamy salad was like a revelation in sprouts.

So I began stalking the internet for hints of how to recreate the recipe, or get close to it, and found this recipe. While I’m not sure that it’s totally accurate to RPM’s real recipe, a few modifications and creative liberties made it taste pretty close and equally enjoyable. It’s shredded texture trickery even had brussels sprout haters digging in.

brussels-salad3

Shredded Brussels Sprout Salad
1 lb Brussels sprouts, ends trimmed and chopped to a fine shred
3/4 C matchstick carrots, chopped into tiny pieces
5 peppadew peppers, patted dry and minced (optional)
1/2 C shredded parmesan cheese
1 C croutons, roughly chopped
1 ripe avocado
1 clove garlic, minced
1 Tbsp lemon juice
4 Tbsp olive oil
1 tsp peppadew juice (optional)
salt
cracked black pepper

Chop brussels sprouts and place in a large bowl. First, trim the ends from the sprouts, then make very thin slices across the width of the sprout so that they resemble confetti. Once you have several in a pile, run your knife roughly through the sprouts to break up any rings. Add parmesan cheese to the bowl.

Finely chop carrots and peppers, if using, and add to bowl. Toss to combine. Roughly chop croutons and set aside.

Combine avocado, garlic, lemon juice, and peppadew juice in a small food processor. Drizzle in olive oil and keep pulsing. Add salt and pepper to taste and pulse again until creamy. Taste and reseason as needed.

Just before serving, toss avocado mixture with salad and mix gently. Add croutons and gently toss.

NOTE: The salad will keep as leftovers or for a second serving but only if you keep the avocado dressing and the salad separate until each serving.

brussels-salad2

brussels-salad

katie

2 Comments

Filed under Appetizers, Garden, Sides

Summer Veggie Salad with Wheat Berries

Between my garden and my CSA box, I can barely keep up with the veggies that are making their way to my countertop. Yet I wait all year for this stuff and can’t bear to let it go to waste or give too much of it away. So I’ve lately been making “cram as much as you can together” type salads to use up the veggies when they’re fresh and taste the best. This is one of those such salads. It’s crunchy, savory, a little sweet, a little nutty and basically tastes like summer should.

This is also one of those recipes that almost doesn’t classify as a recipe because you could easily tweak it to fit the veggies that are overwhelming your counter. Peppers? Sure. Cucumbers? They work too. No wheat berries? So what. While the combo outlined here is rock solid, the options are many.

market-salad2

Summer Veggie Salad with Wheat Berries
2 cobs of corn, kernels shaved off (or 1 1/2 C corn)
1 medium zucchini, cubed
10-15 cherry tomatoes, halved
2 Tbsp fresh basil, chopped
2 oz feta, crumbled
1/2 C wheat berries, cooked
2 Tbsp red wine vinegar
2 Tbsp olive oil
1 Tbsp stone ground mustard
salt to taste

Cook wheat berries according to package instructions or cook 1/2 C wheat berries in 1 1/2 C water. Bring to a boil, then reduce heat and let simmer for 15-20 minutes until wheat berries are tender yet toothsome. Drain wheat berries and let cool to room temperature. Transfer to a medium bowl.

Chop zucchini and add to bowl. Shave corn kernels off the cobs. Place in a small bowl with a splash or two of water. Cover with a paper towel and microwave for 2 minutes to steam cook. Drain and let cool to room temperature. Add to zucchini and wheat berries. Add in halved tomatoes, chopped basil and crumbled feta. Stir gently to mix.

In a small bowl, whisk together oil, vinegar and mustard. Pour over salad and gently toss to coat. Season with salt to taste and toss once more.

market-salad
katie

1 Comment

Filed under Garden, Healthy, Sides

Broccoli, Kohlrabi & Cheddar Soup

Dear Broccoli Cheese Soup,
I’m sorry I always thought you were gross. I was judgy, not believing that you could be anything more than a lunch room catastrophe. I was wrong. As it turns out, you’re a CSA box miracle. A girl can only eat so many kinds of kohlrabi slaw and you neatly absorbed its persistent appearance in my box without batting an eye. I’ve realized the errors of my ways and am now sharing your magic with the world.
Humbly yours,
Katie
kohlrabi-soup
kohlrabi-soup3
Broccoli Kohlrabi & Cheddar Soup
1 large head of broccoli, trimmed to florets
1 large kohlrabi, cubed
3/4 C carrots, julienned
1 small yellow onion, chopped
2 1/2 C chicken stock
2 C sharp cheddar cheese, shredded
1/2 C parmesan cheese, shredded
2 C low fat milk
6 Tbsp butter
1/4 C flour
1 tsp dijon mustard
1 1/2 – 2 tsp kosher salt
cracked black pepper

Trim broccoli. Remove exterior from kohlrabi and cube. Julienne carrots or measure out prepared matchstick carrots. Melt three Tbsp butter in a large stock pot, then add in onions and kohlrabi. Saute for 5-7 minutes, then add broccoli and carrots. Saute for another 5 minutes. Next, add chicken stock to pot. Reduce heat slightly to medium-low and cover. Allow vegetables to steam for 20 minutes, stirring occasionally.

Working in two batches, transfer vegetables and stock to a large food processor or blender and puree to desired consistency (I like mine to be fairly smooth). Transfer pureed vegetables back into stock pot.

Meanwhile, in a separate pot, melt remaining three Tbsp butter over medium heat. Whisk in flour. Gradually add milk about 1/2 C at a time to thin out the flour. Once milk is fully incorporated, whisk in cheeses. Let simmer for 4-5 minutes, stirring occasionally until cheese is mostly melted. Transfer cheese mixture into stock pot and stir to combine.

Stir in mustard, salt and black pepper. Adjust seasonings to taste and let simmer for another 10 minutes.
kohlrabi-soup2

katie

4 Comments

Filed under Garden, Make Ahead Meal

Carrot Cashew Salad with Feta

This year I’ve had my first successful batch of grown-from-seed carrots consistently popping up in my garden and they have been so fun to dig up and play around with in the kitchen. The multi-colored variety makes salads particularly charming, especially when paired up with fellow garden dwellers of mint and jalapeno.

I had originally found this recipe in a Food Network Magazine but took my own twist on it based on some other flavors I love with carrots. You get a great mix of tangy, sweet, and salty flavors with just enough heat to keep you going back for more. This salad also makes for a yummy and filling leftover lunch when paired with a little leftover grilled meat or a chunk of baguette.
carrots

carrot-salad1

Carrot Cashew Salad with Feta
adapted from Food Network
carrots
2-3 oz crumbled feta
1-2 Tbsp mint
1/3 C + 2 Tbsp lightly salted cashew pieces
1 Tbsp olive oil
1/2 jalapeno, seeded & chopped
3 tablespoons lime juice
1/4 cup water

Slice or shave carrots into very thin pieces and place in a bowl. A vegetable peeler or mandolin can create consistent thickness. Add mint leaves, feta and 2 Tbsp of cashew pieces. Meanwhile, puree cashews in a small food processor with oil and jalapeno. Puree in lime juice and water until almost smooth.  Pour dressing over carrots and toss lightly. Season with salt to taste.

carrot-salad2

katie

1 Comment

Filed under Garden, Quick & Easy, Sides

Blue Cheese Burgers with Bacon-Onion Jam

I’ve been the beneficiary of multiple rounds of sweet onions in my CSA during the past few weeks. While in the winter I use onions left and right for soups and warm comfort foods, I never realized that they weren’t a big part of my summer repertoire. Sure, I use them here or there but I tend to sway toward herbally green onions instead.

With a desire to throw as much on the grill as possible in the summer I decided to use my onion bounty to create a gourmet burger. I wanted to caramelize them somehow – I don’t care for them raw – and was lured in by a savory Bacon-Onion Jam recipe on Pinterest. The smoky-sweet jam is chock full of some of my favorite big flavors so it needs a burger that can stand up to it. Enter blue cheese – which does double duty as a fatty/creamy binder if you happen to be using an ultra lean game meat like the elk that I used. Beef will work just fine of course but if you happen to have access to game meat it cuts the richness (and calories) down a little.

Serve with a simple salad to let the burger itself take center stage.
blue-cheese-burger2
Blue Cheese Elk Burgers
1 lb ground elk (or beef, venison, buffalo, etc)
1/2 tsp garlic powder
1/2 tsp liquid smoke
1 tsp Worcestershire
1/2 tsp black pepper
kosher salt
2 oz crumbled blue cheese or gorgonzola
arugula, to serve
fresh hamburger buns

In a large bowl, combine ground meat with garlic, liquid smoke, Worcestershire, black pepper and salt. Mix well using your hands. Add in crumbled cheese and mix gently to incorporate. Portion out meat mixture into 3-4 balls, depending on the size of hamburger patty that you prefer. Gently pat the balls into round patties and use your thumb to indent the middle for more even cooking.

Place on a the upper grill rack of a medium-hot gas grill and cook for six minutes. Flip burgers and cook for another 3-4 min for a “medium” preparation. Burger thickness, your exact grill and your preference in preparation (ie, medium rare versus well done) will cause variance in cooking times to adjust according to your preferences.

Bacon Sweet Onion Jam
Adapted from Smells Like Home
5 pieces thick cut bacon, chopped into bite sized pieces
1 large sweet onion, halved and very thinly sliced
1 Tbsp brown sugar
1/3 C balsamic
1/3 C water
1/2 Tbsp stone ground mustard
kosher salt
black pepper

Heat a large saute pan over medium-high heat. Add the bacon and cook, stirring occasionally until browned but not crispy, about 6-7 minutes. Meanwhile, slice the onions – I like mine sliced paper thin for better caramelization. Remove the bacon from the pan and let it drain on a paper towel-lined plate. Stir in the onions, and season with salt and pepper. Cover the pan to cook the onions for 2 minutes. Uncover the pan and scrape any browned bits off of the bottom of the pan with a spatula or wooden spoon. Recover the pan and cook the onions for another 10 minutes, stirring occasionally, until the onions are soft and beginning to caramelize.

After the onions have cooked, stir in the balsamic vinegar, mustard, and water then return the bacon to the pan and bring the mixture to a simmer. Simmer uncovered until the sauce thickens and is almost completely absorbed, about 5-7 minutes. If using immediately, set it aside in a bowl until ready to use.

To serve: Place burger on the bun and top with jam and arugula.

bacon-onion-jam
blue-cheese-burger
katie

1 Comment

Filed under Garden, Grill

Easy Herbed Green Beans

In my attempts to broaden my gardening horizons I tried my hand at starting pole beans from seed, lured in by the appeal of an Italian heirloom variety called Trionfo Violetto.  Last year my seedlings got hijacked by some greedy rabbit or squirrel but this year, I have four strong plants. The first round of my purple beans was finally ready this week and they are a thing of beauty. Something about eating richly colored purple beans is just that much sexier than everyday green beans, don’t you think?

purple green-beans

Since my first picking had enough for a little over one serving, I happily snatched up some extra green and yellow beans at the weekend farmer’s market, already imagining the gorgeous Mardi Gras-like mix that would appear on our plates.

This recipe is so simple that it feels like a sham to even call it a recipe but may be my favorite way to eat green beans. The combo of freshly picked beans and bright herbs tastes like “garden” in all the best ways and why mess with that?

multicolored green beans

Herbed Green Beans
serves 2-3 but volume is easily increased
1/2 lb green beans
1/2 Tbsp olive oil
1 1/2 Tbsp fresh herbs (basil, mint, parsley & chives), chopped
freshly cracked black pepper
kosher salt

Wash and trim ends from green beans. Add beans to saute pan and drizzle with olive oil. Saute on medium heat for 5-7 minutes until beans are tender and just beginning to blister. While sautéing, season with salt and pepper. When beans have 1-2 minutes left, add chopped herbs. Serve warm.

green beans with herbs

katie

2 Comments

Filed under Garden, Healthy, Quick & Easy, Sides

Anniversary Garden

The hubs and I celebrated our fourth anniversary over Memorial Day weekend. We are a sucker for tradition and stick to the classic list of anniversary gifts. Each year it has been fun to come up with something clever to give one another. We’ve conquered paper, cotton, leather and this year fruit or flowers. While I may beam from a dozen roses, surprising my husband with a basket of fruit or homemade jam just didn’t seem good enough. Therefore, we decided to go in on our gift together.

If you remember last year, I talked about planting a shade garden. We worked on ripping up the old ground cover from the side of the house and took out some shrubs. By the time I was motivated to plant, it was too late in the season. This year, we gave each other the gift of beautiful landscaping and had fun picking out flowers and sprucing up the side walkway of our house.

To dedicate the shade garden, I painted a rock I found in our yard with our anniversary date. I freehanded the letters in pencil and painted them in with some leftover paint I had laying around the house. Now, as we walk past our pretty flowers, we both feel a little extra love.

I researched the best flowers to grow with little sunlight in Wisconsin. We already have bunches of purple daylilies whose blooms we have been enjoying lately. We have also mixed in a few varieties of hostsas. I wanted to add some color at other parts of the season, so I added some astilbes and coral bells to the mix to brighten it up. While you may not be able to see them yet, I also placed Northern Sea Oats to give some height and depth to the garden. We fixed up the edging and added some cypress mulch. We couldn’t be happier with the transformation!

I will share more pictures with you later in the season and next year, when our small plants blossom and bloom!

Do you stick with the traditional anniversary gifts? If so, I’d love to hear your clever ideas!

2 Comments

Filed under Garden

DIY Succulent Terrarium

A few months back my mom came to visit with this large glass apothecary-esque jar in tow.

“I figured you could use it for something,” she said. “Maybe a terrarium?” Brilliant. It was perfect for a terrarium to bring a little green to my new office at work, which happens to have a large, sunny (and empty) window ledge.

Last weekend when picking up a few extra vegetables and plants for my actual garden, I finally got around to getting the goods for my terrarium. Instead of the moisture-loving plants found in many terrariums, I went with charming succulents to create a quirky, low maintenance cactus terrarium.

This is a pretty foolproof project even if you’re not the gardening type. The hardest part of the whole project was editing my plant selection! I ended up with two neon colored cactus, an aloe plant, a mini jade, two sempervivum and a frilly ground cover succulent – which I’m happy to report are thriving so far.

What You’ll Need:
glass jar, apothecary jar or similar transparent container
variety of mini succulent plants, such as cactus, aloe, jade, sempervivum
cactus soil (quantity will depend on size of your container)
small river rocks
gardening charcoal (found at your local garden store)
a spoon

*NOTE: These are rough instructions. Depending on the size and shape of your terrarium container, you may not need all three “soil” items or you may need to adjust things to fit in a smaller container.

1. Line the bottom of the container with a thin layer of charcoal. This helps with drainage and with preventing potential odors in your terrarium.

2. Next, line with a thin layer of river rocks. In a smaller container you could reverse the layers of soil and rocks for a more “zen garden” look.

3. Depending on the size and shape of your container you may be able to put the cactus soil in first or the succulents, filling in the soil around them. I had to put the plants in and use a spoon to fill soil around the plants in order to fit them. Place plants as desired to mix up shapes and colors.
4. Finish off with soil or with additional rocks to achieve the look you want.

Care: Your succulent terrarium needs lots of sunlight but only needs to be lightly watered about once a week. If you choose to keep a lid on it, water less frequently as the plants will generate moisture.

6 Comments

Filed under Decorate, DIY, Garden

Summer Couscous Salad

My neighbor is growing cucumbers and they have literally taken over her garden.  Almost daily, I find 2-3 beautiful cucumbers sitting by my back door.  I have gotten pretty creative using these up, and this couscous salad turned out to be one of my favorites.


Summer Couscous salad

1 box near east couscous, any flavor (I used the toasted pine nut)
1 cucumber, peeled and chopped
handful of fresh garden herbs, minced
1/2 cup toasted pine nuts
1/2 cup crumbled feta cheese

Prepare the couscous according to package directions and let it cool.  Mix in the herbs, pine nuts, feta cheese and cucumber.  Mix to combine.  Serve cold or at room temperature.

I love this dish because it is a wonderful side next to grilled chicken or a meal in itself for a light dinner or lunch!

4 Comments

Filed under Cook, Garden, Healthy, Quick & Easy, Sides