The Man with the Yellow Hat: Curious George Costume

The leaves are turning and so is the weather. That means Halloween is just around the corner! I want to take the time to revisit a post of mine from a few years ago that’s been getting a lot of action on Pinterest and the web as well as many comments and questions. My little Curious George lover was the Man with the Yellow Hat when he was three. It was my version of a homemade costume (which means no sewing!). So today I will share with you how I put this together!

Man with the Yellow Hat


Items needed:

White oxford shirt
White (or very light khaki) pants
Sunshine Yellow Rit Dye
Yellow felt
Black felt
Safety pins
Yellow hat
Foam if needed
Black ribbon
Tacky glue
Brown adult socks
Brown shoes
And of course…George.

For the outfit: I looked everywhere for a bright yellow shirt and came up with nothing. That’s when I decided to try my first turn and dying clothes. So much fun! I bought a white oxford shirt and very light khaki pants from Old Navy (white would be better but was hard to find in the fall, and for boys!). Shirt can be found here.  Similar pants found here.  Following the directions on the package, I used yellow Rit Dye to turn both pieces the bold yellow I was looking for.

I used my husband’s brown socks and hiked them up over the pants, pairing them with his brown shoes. Debate on brown or black can happen between the book and the show, but I went old school. I’m a writer and a purist, what can I say?

For the hat: The hat is actually what I would call an adult pimp hat from a local Halloween store. Or perhaps some would call it a cowboy hat. Either way, I took black ribbon and adhered it to the hat with tacky glue. Now, because the hat was adult-sized, I glued in some foam pieces on either side above the ears to make it a bit more snug. Worked like a charm!

If you’re more inclined to make it taller, here is a Pinterest tutorial for making your own (from Molly Sews).

For the  tie: Again, I don’t sew. So for the tie, I freehand drew an outline of a tie and cut it with felt. I cut black polka dots and stuck them to the tie with tacky glue. I then pinned the tie to the shirt with a safety pin.

Once little Lincoln picked up George, all he needed to do was say, “Now be a good little monkey…” and the costume was complete!

I hope this helps and that you and your little ones have a wonderful Halloween!

stef

5 Comments

Filed under Halloween, Holidays

Cilantro Peach Salsa

Well, hello! It’s been awhile! I apologize for the long delay in posts. But I’m happy to announce my family is settled back in the great dairy state of Wisconsin! So moving, houses, boxes, jobs, kids, blah blah blah = hiatus. But I’m back to share a peach salsa recipe that is out of this world.

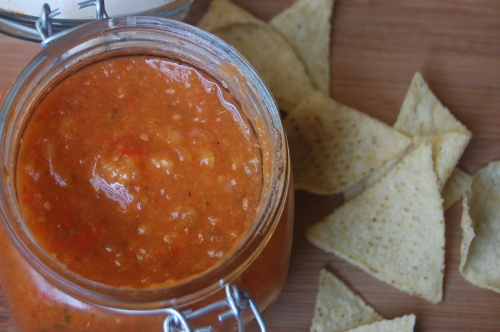
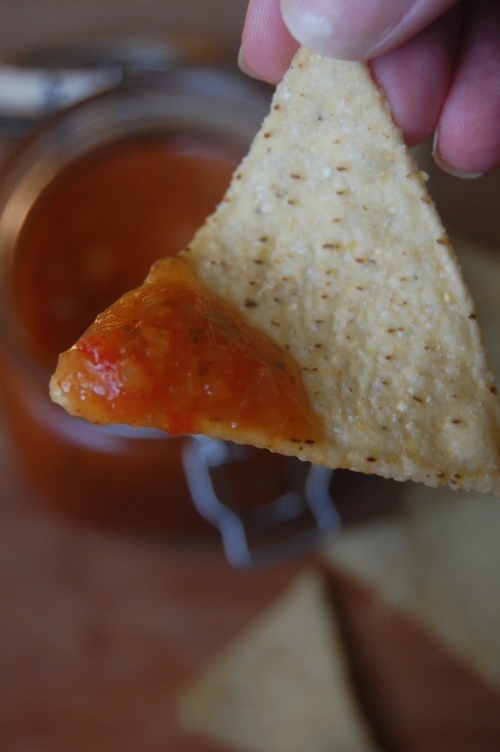
I’m once again honored to receive the most beautiful box of peaches from the Washington State Stone Fruit Growers to participate in a canning recipe for www.sweetpreservation.com. These were the juiciest peaches I’ve ever eaten and the juice dripping down my 1-year-old’s chin would agree! I wanted to pair them with some other garden fresh items, so I added  tomatoes and cilantro to make a wonderful salsa that is not only delicious as a condiment, but makes the most amazing pulled pork ever. Pork shoulder, jar of cilantro peach salsa – bam! (to steal from Emeril) and you’ve got one great dinner.

So without further ado, here is the recipe so you can try it for yourself. Salsa can seem daunting but it isn’t!

Cilantro Peach Salsa

Cilantro Peach Salsa
Makes approx. 10 cups
12 fresh, ripe peaches
9 large tomatoes
1 green pepper, diced
1 large onion, diced
3 jalapeño peppers, diced (leave seeds in for more spice)
3 cloves garlic, minced
1 large handful of cilantro, minced
3/4 C apple cider vinegar
2 TBSP paprika
2 TBSP chili powder
1 TBSP salt

To peel the peaches and tomatoes, start with a large stock pot of boiling water. Place tomatoes in the water for 2-3 minutes, or until the skin starts to split. Immediately place tomatoes in ice bath to cool. Once cool to touch, the skins will slide right off. Cut into large chunks.

Using the same pot of water, do the same with the peaches. Place in water for about 1-2 minutes until the skin starts to peel away. Place in ice water bath, peel and cut into chunks.

In a large stock pot, add tomatoes, peaches, green pepper, onion, jalapeños, garlic, cilantro and apple cider vinegar. Heat on medium-high heat and stir. Add paprika, chili powder and salt. Stir and allow to simmer for about 20-30 minutes.

Remove from heat. Using an immersion blend, blend ingredients together to your preferred texture. Spoon into jars and following preserving instructions from http://www.sweetpreservation.com!

Cilantro Fresh Peach Salsa

(If you prefer not to go through the canning, this salsa will last 2-3 weeks in a tight container in the refrigerator.)

stef

1 Comment

Filed under Appetizers, Cook, Garden, Healthy

Homemade Cherry Pie Filling

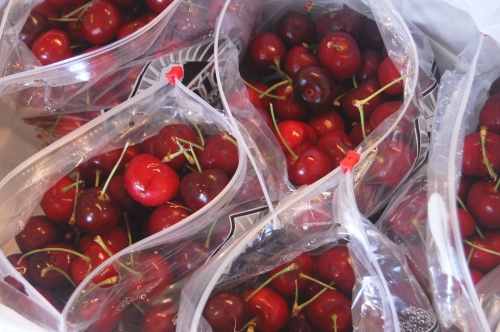
What’s summer without a little cherry on top? We were fortunate enough to receive a gorgeous shipment of Rainier Bing Cherries from the folks at SweetPreservation.com. I’m a huge sucker for a real cherry pie (for the Wisconsinites out there, a Door County Cherry Pie, what? Does it get better?). Here’s my cherry pie secret: I’ve never made one. Gasp! Well, praise to the pie gods, I’m all ready to go now.

Washington Stone Fruit Cherries

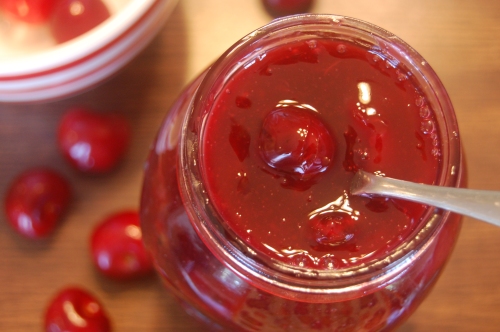
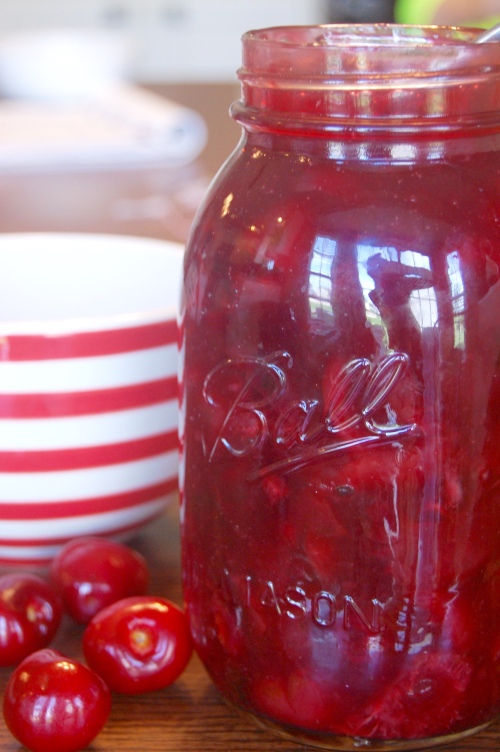
This homemade cherry pie filling is sweet and tart all at the same time. It’s beautiful in color and will work well as a pie, crepe, or donut filling or as a pancake, waffle or ice cream topping. Or scoop it right out of the jar and eat it by the spoonful. It’s that good.

Pitting the cherries is two-thirds the battle. I took a Wilton frosting tip (#3!), stuck it on the end of my finger and pushed the pits out. You could purchase a cherry pitter which looks amazing, but if they didn’t have it at Target, I wasn’t getting one. So strap on an apron, get ready to have some red fingers and let the good times roll!

Homemade cherry pie filling

Homemade Cherry Pie Filling
5 C stemmed and pitted Bing cherries
3/4 C granulated sugar
2 TBSP lime juice
4 TBSP cornstarch
1/2 C water

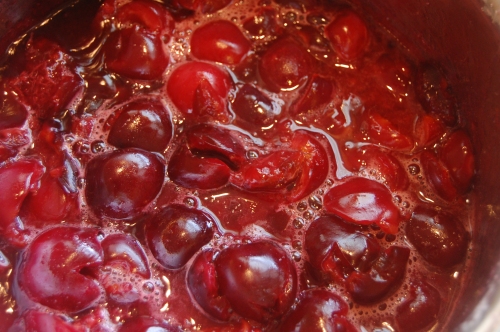
Add cherries, sugar and lime juice to a large saucepan. Heat on medium, allowing cherries to warm, releasing their juices. Stir occasionally, about 5-10 minutes. Meanwhile, mix cornstarch and water together in separate bowl. When cherries are warmed through, mix in cornstarch mixture. Allow to heat through to boil, another 5-10 minutes. Stir occasionally. Remove from heat. Allow to cool.

Cherry pie filling

If you’re canning, following the step by step canning methods on Sweetpreservation.com.

Stay tuned for more cherry recipes to come!

DSC_0082

stef

Leave a comment

Filed under Cook, Treats

Smoked Gouda Scalloped Potatoes

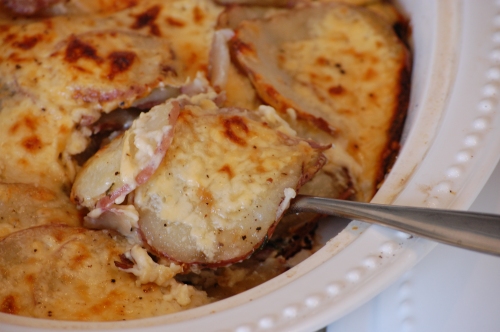
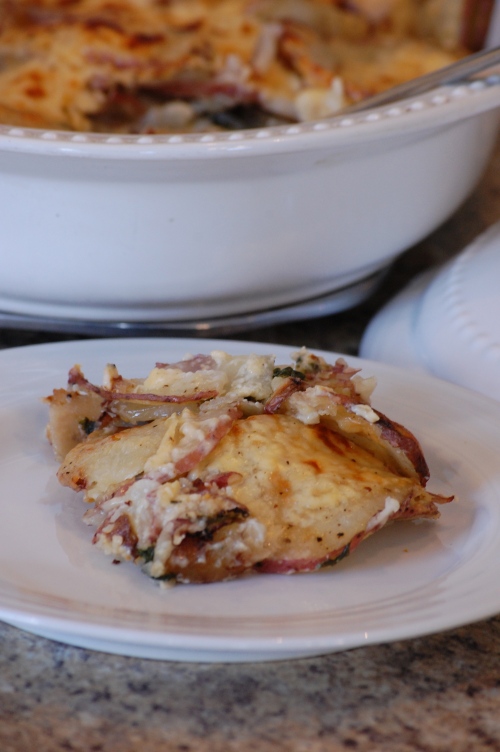
Spring is in the air and Easter is right around the corner! Looking for the perfect side dish to go with your ham? Look no further. These smoked gouda scalloped potatoes are the perfect compliment to that holiday ham. The smokiness of the cheese combines perfectly with the potatoes to create a savory side dish that will get all of your relatives talking. Or not talking. Because they will be too busy eating. And grabbing seconds.
smoked gouda scalloped potatoes
Smoked Gouda Scalloped Potatoes
Serves 8
2 lbs red potatoes, scrubbed and thinly sliced
8 oz baby spinach, chopped
1 TBSP olive oil
2 TBSP unsalted butter
2 TBSP flour
1 C whole milk
1/2 tsp garlic powder
1/2 tsp salt
1/4 tsp cracked black pepper
8 oz smoked Gouda, rind trimmed and shredded
4 oz shredded Parmesan
Preheat oven to 400 degrees.
In a saucepan, melt butter. Whisk flour until combined. Slowly whisk in milk. Add garlic powder, salt and pepper. Simmer over medium high heat for 5-8 minutes. Slowly add Gouda, whisking as it melts. Set aside.
In a saute pan, heat olive oil. Add spinach and heat until wilted. Remove from heat.
In a shallow 3 quart baking dish, layer first half of potatoes. Layer sautéed spinach and half the Gouda sauce. Spread to cover potatoes. Layer the rest of the potatoes and cover with remaining sauce. Sprinkle Parmesan over the top. Cover with foil and bake for 50 minutes. Remove foil and set oven to low broil. Broil until crust turns brown and crispy, 1-3 minutes.
Let stand for 10 minutes before eating.
smoked gouda potatoes
Looking for other Easter side dishes? Check out these #SensationalSides from our friends at the Food Network and around the web!
A blessed Easter to one and all!
stef

6 Comments

Filed under Cook, Sides

LEGO Birthday Party

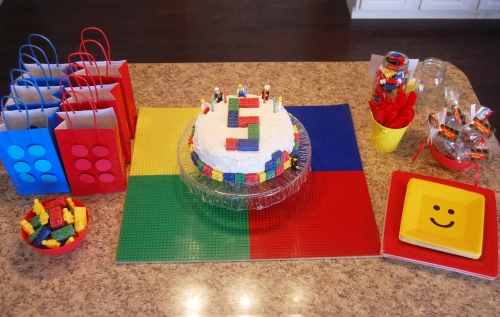
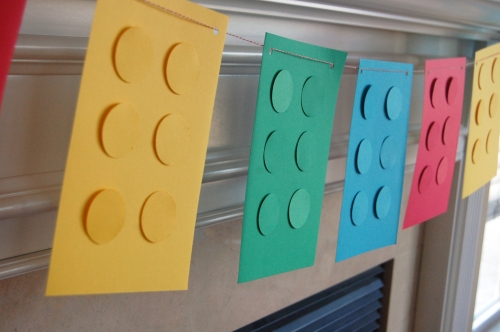
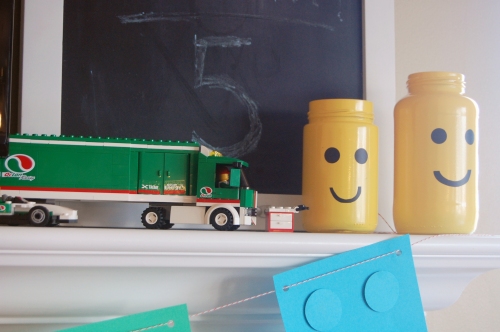
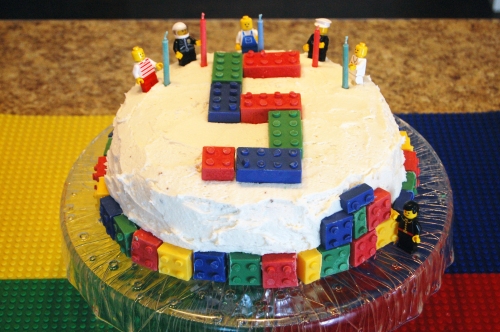
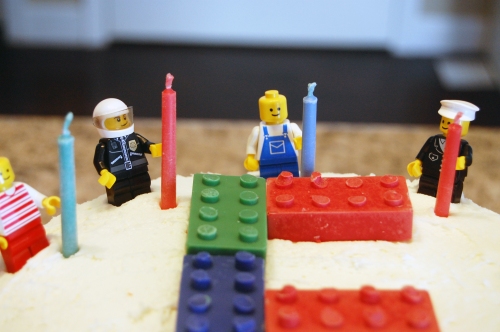
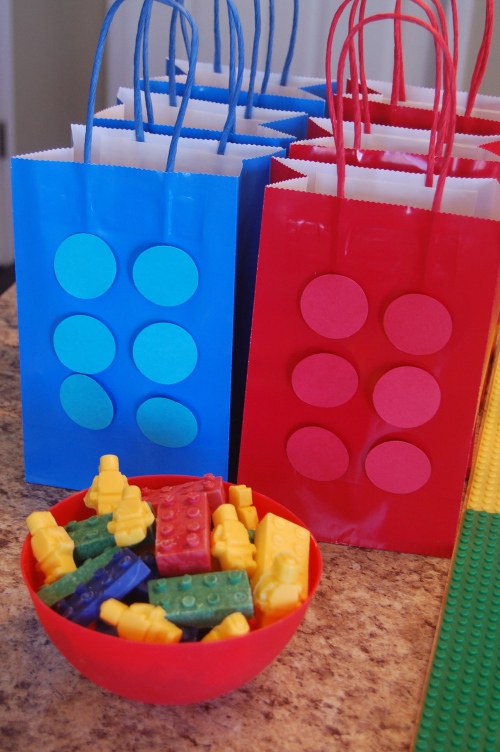
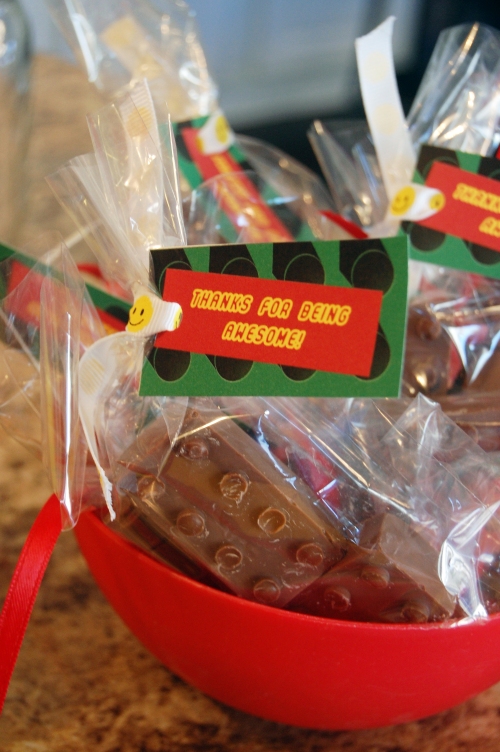
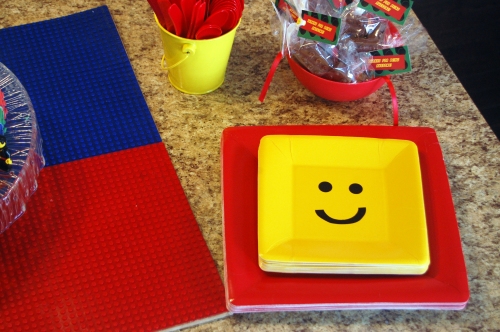
It’s hard to believe I’m posting my little man’s fifth birthday. We’ve come along way from our Little Peanut party. LEGOs…ahhh LEGOs. Timeless small land mines of colorful plastic that will occupy your typically boisterous child for hours on end. Parents rejoice! I was more than happy to oblige when Lincoln decided he wanted a LEGO birthday party. Fun, easy and colorful, there are so many options to create your very own LEGO party on a very limited budget. Many of the items were made by using a circular hole punch and foam squares to raise the circles off the paper. We utilized many of the LEGO items we have in our house for colorful accents! LEGO partyI created an invitation similar to this sign, which adorned our mantle along with a few other Lincoln and LEGO items. LEGO party sign lego bunting I painted pasta sauce and salsa jars using a yellow spray paint. The face was made by punching out circles and cutting mouths from adhesive black paper, then sticking them to the jar. DSC_0060 DSC_0065 The kids all decorated LEGO man faces and played a rousing game of Pin the Head on the LEGO man! DSC_0066All of our party guests were asked to guess how many LEGOs were inside the jar. The winner won some birthday cake M&Ms! DSC_0069 The cake was a homemade chocolate cake with buttercream frosting. The “LEGOs” were candies made by melting candy melts and placing them in a LEGO block candy mold. Some of Lincoln’s LEGO men made an appearance to help hold the candles for the birthday boy. DSC_0071 DSC_0072 DSC_0073 The treat bags were filled with small lego kits and chocolate lego candy favors. DSC_0077 The grown ups also received some chocolate candy LEGOs as a parting gift. And for being awesome. DSC_0079 We purchased yellow square plates and used the same black adhesive paper from the pasta jar lego head to make a variety of faces. DSC_0087 Our big five-year-old and his almost five-year-old cousin were very excited for the party! Happy birthday Lincoln! We think you’re awesome! 
stef

2 Comments

Filed under Birthday

Mississippi Mud Pie

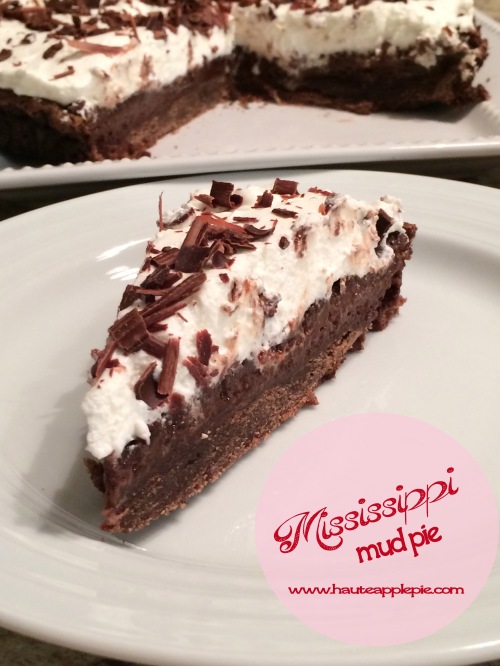
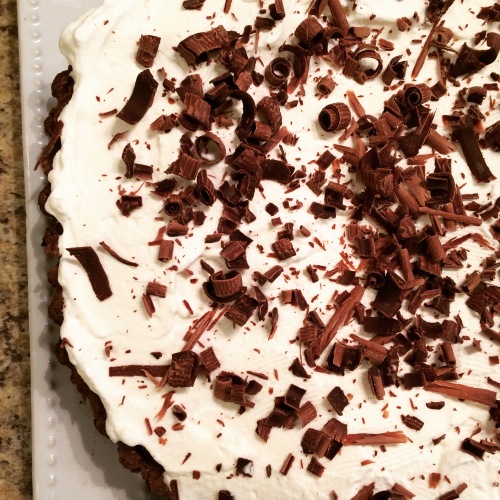
Every year, I treat my valentine (and in this case, my three valentines) to a special chocolate treat. As I’ve stated before and hopefully you’ve forgotten, I actually do not like chocolate. And not in the “I’ll eat this but it’s not my favorite” way but in the “if an M&M happens to make it’s way into my DQ Blizzard I might throw something at someone” way. It makes me less likable, I know this. People are literally offended at this fact so I try not to mention it. So, forget you ever read this. Now that we live a stone’s throw away from the mighty Mississip, I found it fitting to take on a truly chocolate pie. This was almost what I’d consider the Great Pie Fail of 2015, but it surprisingly turned out great. It’s got a flaky chocolate pie crust, an ooey gooey chocolate center and a fluffy whipped topping. Plus the shaved chocolate on top makes it look kind of fancy, don’t you think? Mississippi Mud Pie Mississippi Mud Pie Crust: 1 2/3 C all-purpose flour 2 TBSP unsweetened cocoa 1 1/2 sticks unsalted butter, cubed and cold 2 TBSP sugar 3-4 TBS cold water Filling: 1 1/2 sticks unsalted butter 1 3/4 C packed light brown sugar 4 eggs 4 TBSP unsweetened cocoa 6 oz semisweet chocolate chips 1/2 C half and half Topping: 1 C heavy whipping cream 1 bar semisweet chocolate For the dough: Mix flour and cocoa in large mixing bowl. Add butter and cut in with a pastry blender until the mixture is crumbly. Gently mix in sugar. Drizzle cold water over dough and work into a ball. Wrap in plastic wrap and refrigerate for 30 minutes or more. Preheat oven to 350. Roll dough on a lightly flour surface. Place in pie dish or loose-bottomed tart pan. Place parchment paper on top and set dried beans or pie weights on top. Bake for 15 minutes. Remove from oven and remove parchment and beans. Bake for 10 more minutes. Set aside. For filling: Beat butter and sugar on medium speed. Add eggs one at a time until combined. Add cocoa one TBSP at a time. On the stove, melt chocolate chips in a heatproof bowl atop a pot of simmering water, stirring continuously. When melted, remove from heat and whisk in cream. Add chocolate mixture to bowl and beat at a medium speed. Reduce oven temperature to 325 degrees. Pour mixture into pie shell and bake for 45 minutes. Remove from oven and cool completely on wire rack. Transfer to plate. In a mixture with a whisk attachment, beat whipping cream at a high speed for approximately 5-8 minutes or until thick. Spread on top of pie. Using a vegetable peeler, shave chocolate to sprinkle over top. Slice and serve. Mississippi Mud Pie whole

Can’t get enough chocolate? Try some of these for your sweetie this Valentine’s Day from our friends around the web!

The Lemon Bowl: Dark Chocolate Cupcakes with Peanut Butter Creamy Cheese Frosting
Feed Me Phoebe: Dark Chocolate Beauty Bark with Chia Seeds, Pepitas and Goji Berries
The Heritage Cook: Gluten-Free Black & White Brownies with Orange Glaze
Virtually Homemade: Chocolate Covered Strawberries with Coconut
Creative Culinary: Raspberry Boccone Dolce (Pavlova with Chocolate and Raspberries)
Daisy at Home: Mocha Mousse Marshmallow Cake
The Mom 100: Molten Chocolate Peanut Butter Cakes
Dishin & Dishes: Espresso Truffles
Elephants and the Coconut Trees: Chocolate-Covered Strawberries
The Cultural Dish: Moroccan Pots de Creme
Red or Green: Dark Chocolate Truffles- 4 Flavors 
Napa Farmhouse 1885: Chocolate-Coconut-Cashew Bark with Sea Salt
The Wimpy Vegetarian: Chocolate and Pretzel Bark with Sea Salt
In Jennie’s Kitchen: Fudgy, Chewy Brownies {dairy free}
Taste with the Eyes: Chocolate Mint Parfaits with Chocolate Hearts
Food for 7 Stages of Life: Everyday Chocolate Granola
FN Dish: Melt Hearts with Handmade Chocolate Sweets — Comfort Food Feast

stef

6 Comments

Filed under Treats, Valentine's Day

Healthy Banana Oatmeal Pancakes

I’ve seen plenty of recipes and pins around the web for “pancakes” made with just eggs and bananas. I’ve tried this. It’s not bad. I’ve also tried “pancakes” that are eggs and oatmeal. Also not bad. But I don’t want not bad. I want good! I want delicious! I want to feel like I’m really eating a pancake darn it! I’ve decided to combine the two ideas with a few other extra additions for a healthy version of a pancake that is super fast to whip up and healthy for the whole family. This version resembles more of a pancake to me. My little man gobbled them up with the addition of a few blueberries and some maple syrup. Sliced almonds and a drizzle of honey for me and it was a great sweet and healthy way to start the day. Oatmeal Banana Pancakes Healthy Banana Oatmeal Pancakes Makes 10-12 3 eggs 1/2 cup old-fashioned oats 1/4 plain non-fat Greek yogurt 1 ripe banana 1 tsp cinnamon 1/2 tsp vanilla Honey and sliced almonds if desired Preheat a skillet. Add all ingredients (minus honey and almonds) to a blend or food processor. Blend until smooth. Grease skillet and pour batter into circles. Flip when top becomes bubbly. Cook for another minute or two – until cooked all the way through. Remove from skillet. Drizzle with honey and top with sliced almonds. Enjoy!

Here are some more great pancake recipes from around the web with our friends from Food Network!

The Lemon Bowl: Peanut Butter and Jelly Pancakes
Dishing with Divya: Grain Free Pancake Muffins
Taste with the Eyes: Savory Korean Breakfast Pancake
The Mom 100: Pumpkin Pancakes
Dishin & Dishes: Red Velvet Pancakes
Napa Farmhouse 1885: Sweet Potato Pancakes with Chipotle Drizzle
Red or Green: Cornmeal Pancakes with Gingered Berries
Weelicious: Whole Wheat Pancake and Waffle Mix
The Wimpy Vegetarian: Spinach & Garlic Chickpea Pancakes with Sriracha Yogurt
Domesticate Me: Ricotta Pancakes with Maple-Bourbon Whipped Cream
Creative Culinary: The Best Buttermilk Pancakes
FN Dish: A Short Stack of Perfect Pancake Recipes

stef

2 Comments

Filed under Breakfast, Cook, Healthy

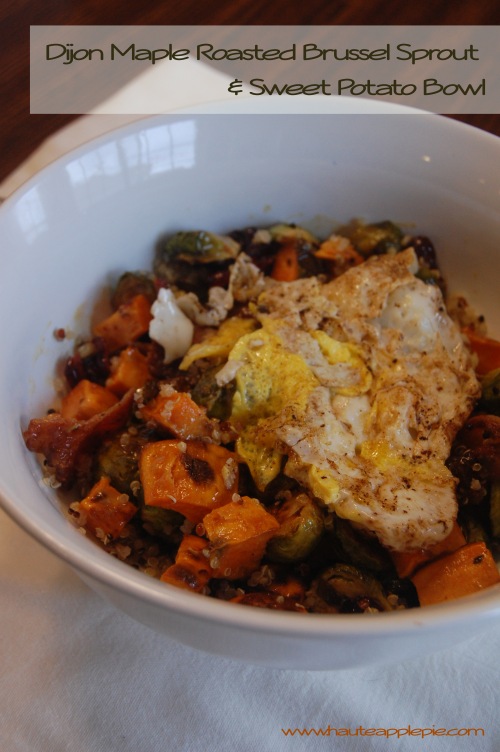
Dijon Maple Roasted Brussel Sprout and Sweet Potato Bowl

I’ve been a vegetable roasting machine lately. I love hearty roasted vegetables thrown on top of some kind of grain (couscous, barley, quinoa, etc.), typically I toss some Sriracha on and call it a day. I recently bought some beautiful Brussel sprouts and wanted to make more of a planned meal out of them. This dish, combined with the hint of sweetness from the maple and the tang of the Dijon are a perfect pair. The runny egg on top really takes the cake (an addition I made while eating the leftovers).

Dijon Maple Roasted Brussel Sprout

Dijon Maple Roasted Brussel Sprout and Sweet Potato Bowl
1 sweet potato, peeled and cubed
2 C Brussel sprouts, stems cut and halved lengthwise
2 TBSP Dijon
1 TBSP pure maple syrup
1 TBSP extra virgin olive oil
1/2 C dried cranberries
4 pieces thick-cut bacon, cooked and chopped
2 C prepared quinoa (or other hearty grain)
egg

Dijon Maple Vinaigrette
2 TBSP Dijon
1 TBSP pure maple syrup
1 TBSP extra virgin olive oil
2 TBSP apple cider vinegar
1/4 tsp ground pepper

Preheat oven to 400 degrees. Spread sweet potato and Brussel sprouts on baking sheet. In a small bowl, mix Dijon, maple syrup and olive oil. Brush over vegetables. Roast in oven for 30 minutes, flipping half way through. With five minutes to go, sprinkle dried cranberries on baking sheet. Remove from oven. Pour contents into bowl. Add bacon.

Whisk together vinaigrette ingredients. Drizzle over vegetable mixture (you may not use the whole thing). Mix to coat.

Place quinoa in bowl. Add vegetable mixture.

Crack egg into small, non-stick, preheated skilled. Cook until egg white becomes thick. Flip and cook for one minute. Add to top of bowl.

Dijon Maple Brussel Sprout Bowl

Enjoy!

stef

3 Comments

Filed under Cook, Healthy

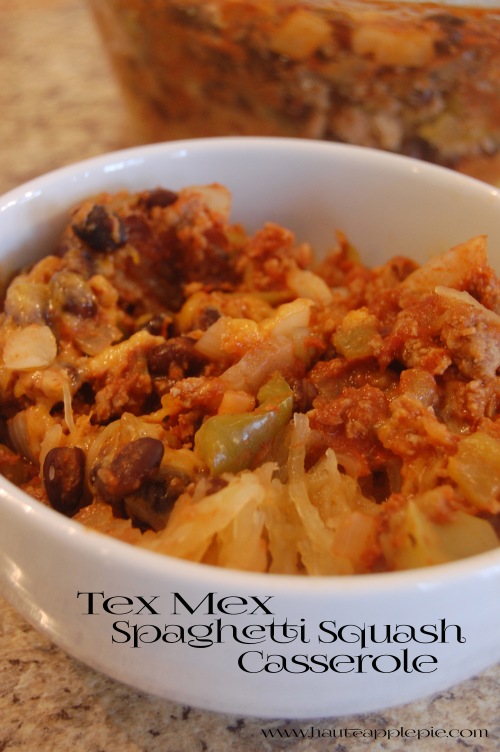
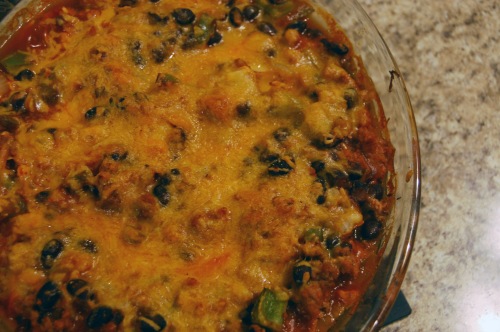
Tex Mex Spaghetti Squash Casserole

New year, new you? So many of us try to start out the new year with healthy eating. Whether it is a resolution or just detoxing from the holiday, it’s a great way to begin the year out right. I’m always trying to figure out ways to make clean, healthy meals that will feed my whole family. Double bonus if it is a one-pot dish.

I’ve been mildly obsessed with spaghetti squash this year. Typically I use it in place of spaghetti noodles with meat sauce and my whole family loves it. This week, I decided to take spaghetti squash tex-mex.

This dish is delicious and adaptable to what you have in the pantry or the level of heat you prefer.

Tex Mex Spaghetti Squash

Tex Mex Spaghetti Squash Casserole
Serves 8

1 large spaghetti squash
1 1/2 lbs ground turkey
1 green pepper, chopped
1 small yellow onion, chopped
1 can diced green chilies
1 can black beans
1 12 oz can tomato sauce
1 C salsa (whatever you have on hand – I used black bean and corn salsa)
1 TBSP chili powder
1 tsp chipolte powder
1 tsp cumin
1/2 tsp black pepper
1 C low-fat shredded sharp cheddar

Preheat oven to 375. In large casserole dish, cover bottom with shallow layer of water. Cut squash in half lengthwise and scoop out the seeds. Place upside down in dish. Heat in oven for 45 minutes.

While squash is cooking, brown turkey in a large pot on medium high heat. Drain any excess grease. Add green pepper, onion, green chili and green beans. Saute on medium heat until vegetables are softened. Add tomato sauce, salsa, and spices. Simmer on low until spaghetti squash is finished.

When spaghetti squash is done, remove from oven. Scrape insides of squash into a deep casserole dish. Spread turkey mixture over top of the dish. Sprinkle cheese on top and place in oven for 25 minutes.

tex mex spaghetti squash casserole

Feel free to add some spicy jalapeños or or kicked-up salsa to make this dish extra spicy! A little queso fresco instead of cheddar is also delicious.

It’s Comfort Food Time on the Food Network Dish. Check out these other awesome casseroles from our friends around the web!

The Cultural Dish: Mediterranean Fish Casserole
The Heritage Cook: Arroz Con Pollo Casserole (Gluten-Free)
The Wimpy Vegetarian: Baked Artichoke Radicchio Risotto with Lemon-Caper Breadcrumbs
Taste with the Eyes: Mini Shrimp and Grits Casseroles
Napa Farmhouse 1885: Lasagne al Forno with Chard & Mushrooms
Red or Green: Pasta “al forno” Casserole with Mushrooms, Peppers & Vegetables
Swing Eats: Pastitsio: A Delicious Greek Pasta Casserole (gluten-free)
Virtually Homemade: Tamale Pie
Weelicious: Chicken Wild Rice Casserole
Domesticate Me: Baked Orzo with Turkey Sausage, Broccolini and Fontina
FN Dish: 5 Hearty Casseroles Ready to Warm You Up

Happy New Year to everyone from Haute Apple Pie!

stef

3 Comments

Filed under Cook, Healthy

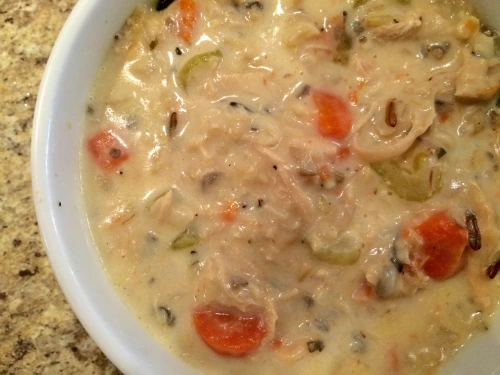
Creamy Turkey Wild Rice Soup

Tomorrow is the big day but I’m already looking forward to the day after. And the day after that. That’s right. Thanksgiving leftovers. I can’t help myself when it comes to leftover turkey anything. Soup, sandwich, casserole, omelet, you name it! I’ve always been a sucker for the Chicken Wild Rice Soup from Panera (or as they call it here in STL, St. Louis Bread Co.) This recipe combines the juicy leftovers (dark meat too!) along with a creamy texture and savory rice to make for the perfect soothing post Thanksgiving Day meal. And if you’re like me and get sick every year around this time, it helps with that as well.

IMG_2418.JPG

Creamy Turkey Wild Rice Soup
Serves 6-8

1 C wild rice
2 C water
2-3 C leftover turkey
5 C chicken stock (turkey or vegetable work too)
3 medium carrots, peeled and sliced
3 large celery stalks, chopped
1 C mushrooms (any kind), chopped
2 tsp minced garlic
1/2 tsp oregano
1/2 tsp salt
1/2 tsp pepper
4 TBSP unsalted butter
2 TBSP flour
2 C milk

In a medium saucepan, add rice and water. Bring to boil. Reduce to simmer and cover. Simmer for 30 minutes. The rice will not be fully done. Add rice and any remaining water to chicken stock mixture in large stock pot.

In large stock pot, add chicken stock, turkey, carrots, celery and mushrooms. Bring pot to a simmer and add garlic, oregano, salt and pepper. Keep at low simmer.

In a medium saucepan, melt butter. Add flour and whisk until mixture bubbles. Slowly whisk in milk. Whisk continuously until mixture thickens. Remove from heat and add to large stock pot. Mix together and stir occasionally at a low heat until soup is thickened.

Ladle and enjoy!

IMG_2419.JPG

When reheating leftovers, you may want to add a little extra milk to the mixture before reheating. The rice tends to pull in the liquid when saved.

Happy Thanksgiving to you!
stef

1 Comment

Filed under Cook, Healthy, Quick & Easy, Thanksgiving